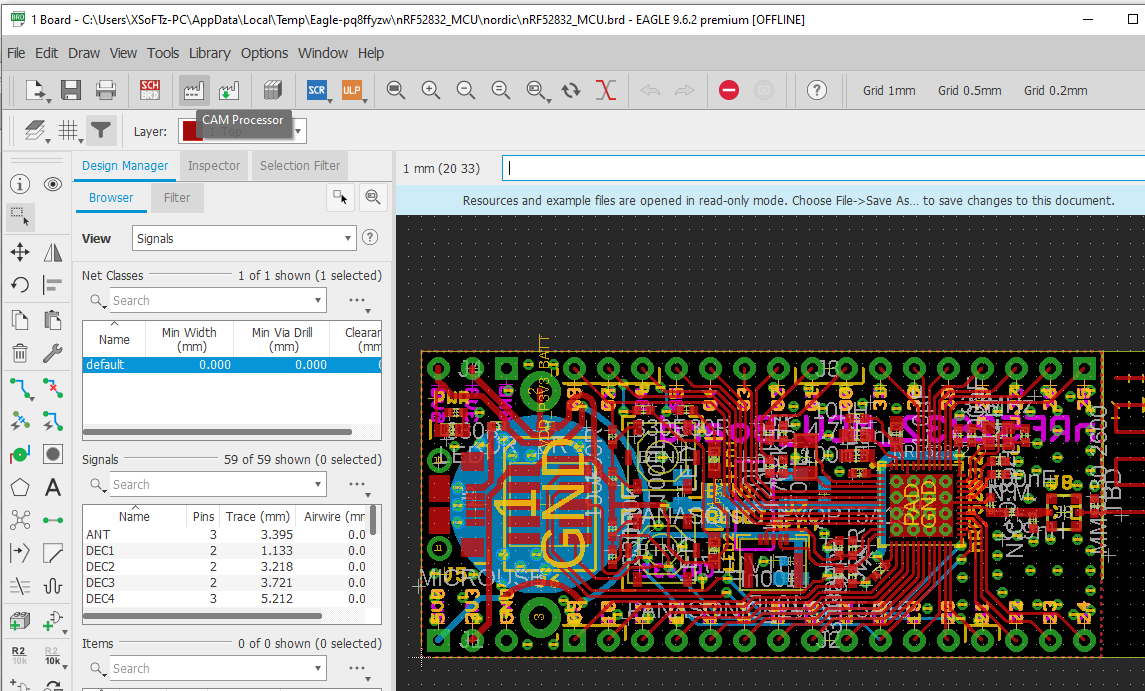
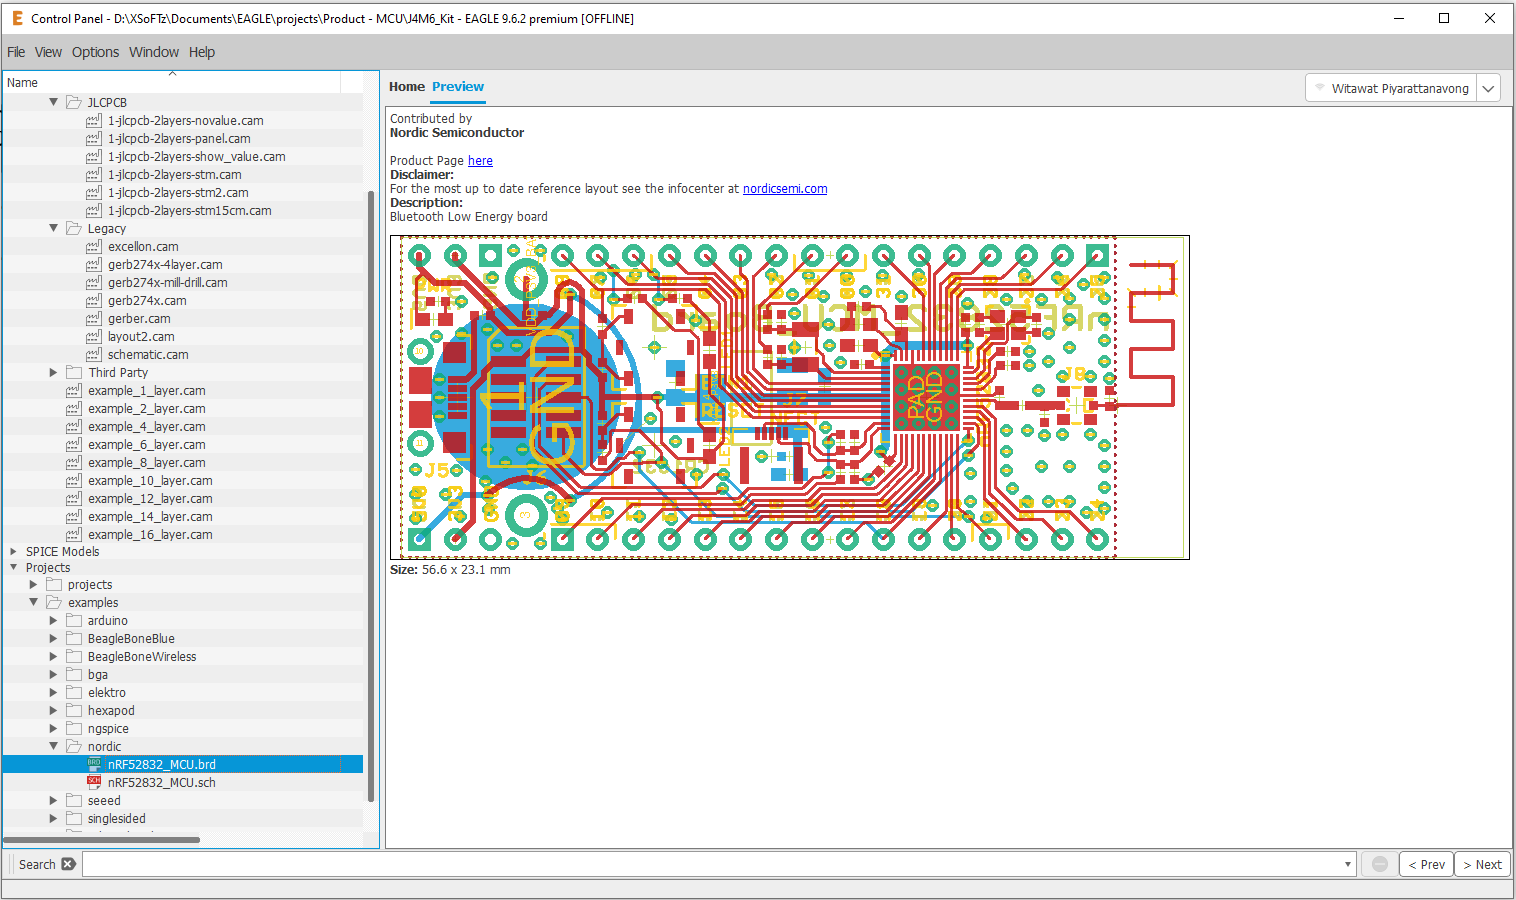
ในการออกแบบ PCB ด้วยโปรแกรม Eagle หลังจากที่เราออกแบบเรียบร้อยแล้ว จะต้องส่งไฟล์ให้โรงงานผลิต PCB ในบทความนี้ จะออกส่งไฟล์ GERBER ให้กับ โรงงานยอดนิยมของจีนที่มีราคาในการผลิต PCB ที่ค่อนข้างถูกในบางแบบ ส่วนใหญ่ จะเป็นรูปทรง สีเหลี่ยม ขนาดต่างๆ
ข้อกำหนดของทาง JLCPCB
ทาง JLCPCB ได้มีการกำหนดมาตราฐานในการตั้งชื่อไฟล์ในแต่ละ Layer ตามรูปด้านล่าง
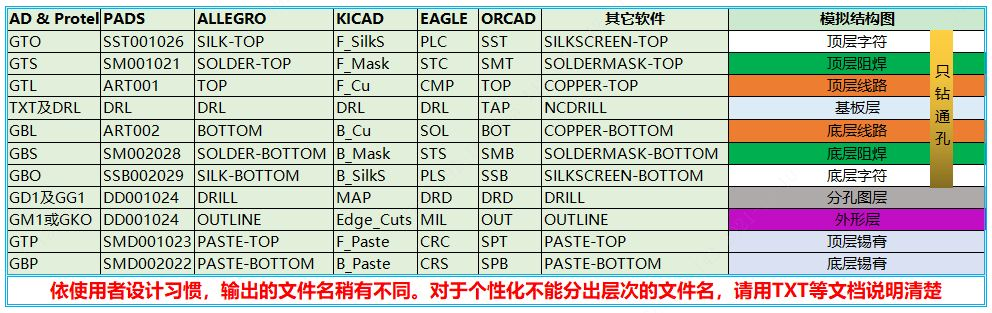
โดยนามสกุลที่ใช้ จะอยู่ในตารางช่องแรก (AD&Protel) ถ้าตั้งค่าตรงโปรแกรมแสดงตัวอย่างของ JLCPCB ก็จะแสดงผลได้ดี หากตั้งค่าไม่ตรงอาจจะทำให้งานที่ส่งไปไม่ได้ตามแบบที่ต้องการได้
วิธีการตั้งค่า Profile ของ Eagle version 9.6
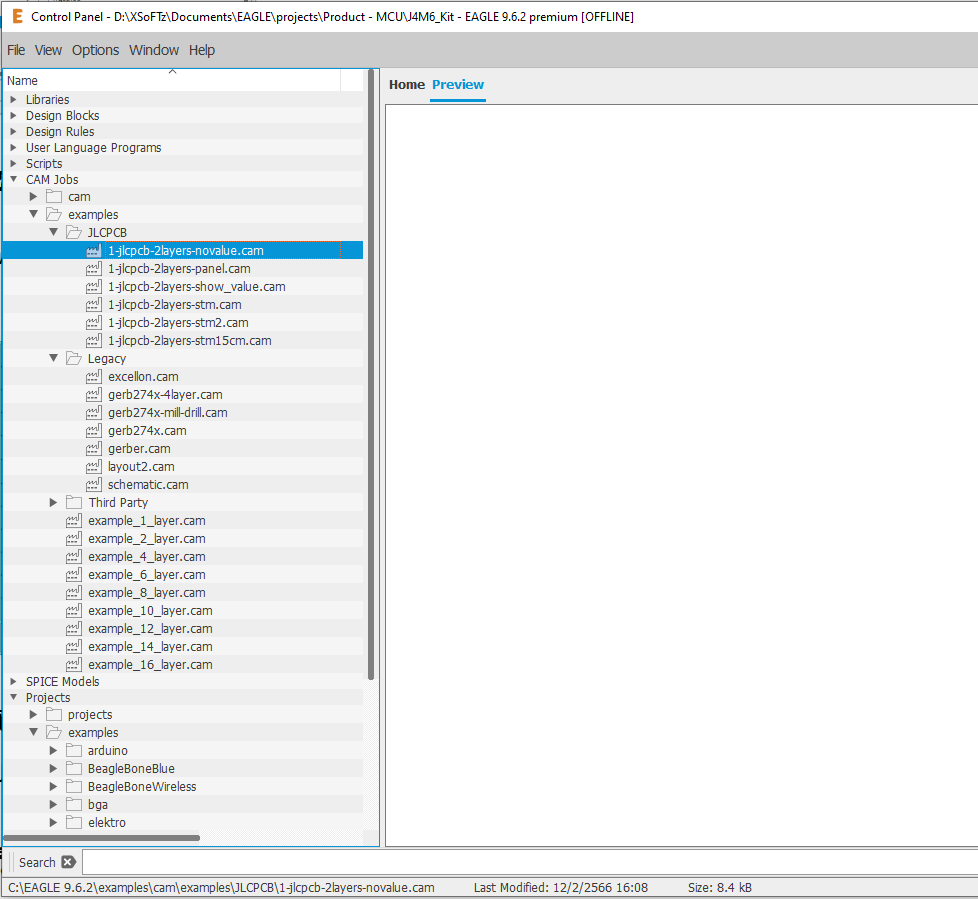

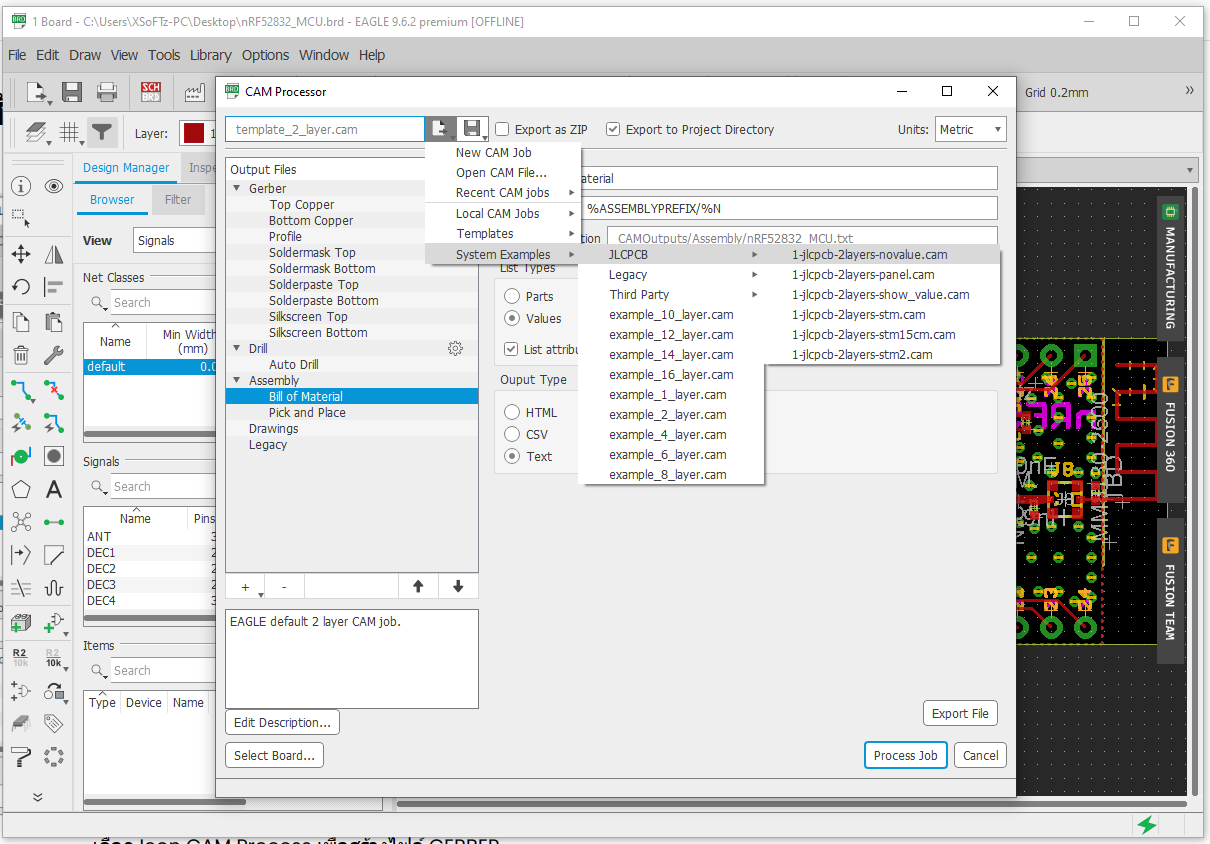
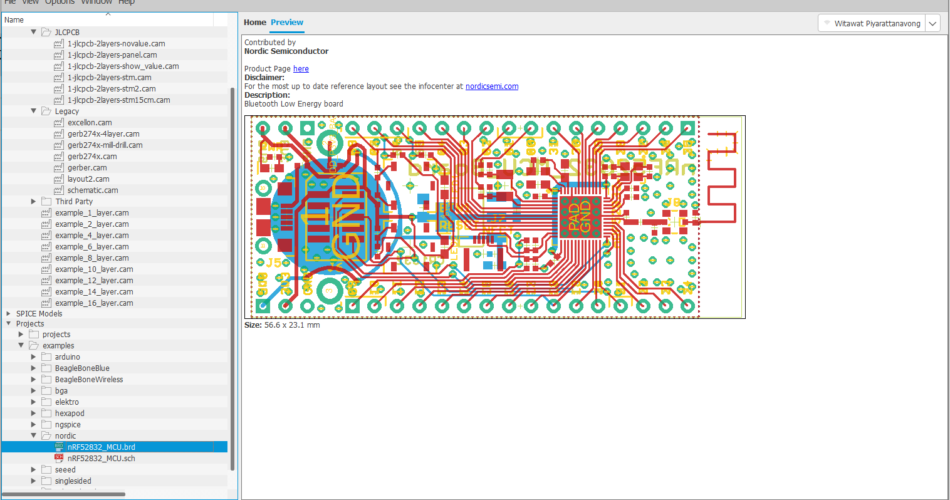
วิธีการนำเข้าไฟล์ CAM
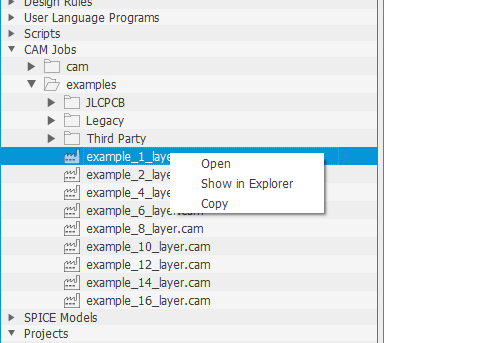
เลือก ไฟล์ที่ Panel > CAM Jobs > example_1_layer.cam แล้วคลิ๊กขวา แล้วเลือก Show in Explorer
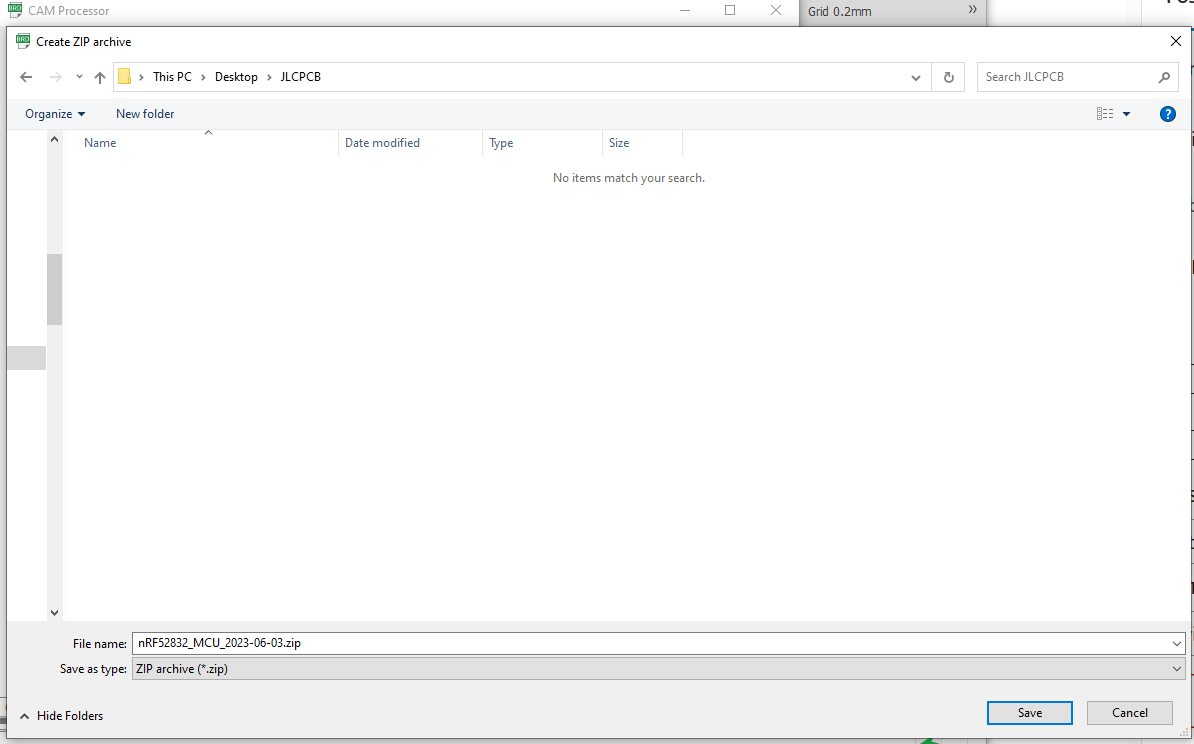
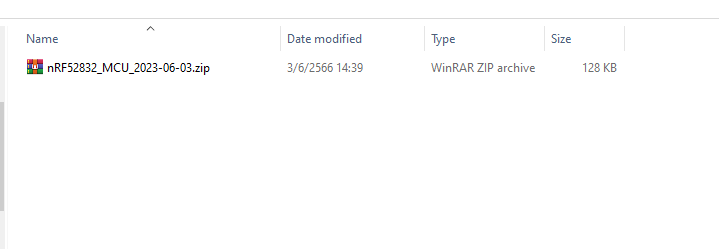
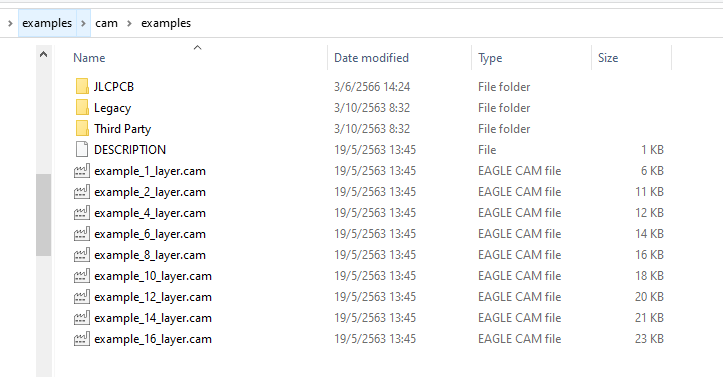
นำไฟล์ที่ Download มาวางไว้ใน โฟลเดอร์ นี้ หรือ สร้างโฟลเดอร์ใหม่ชื่อ JLCPCB และนำไฟล์ไปวางไว้
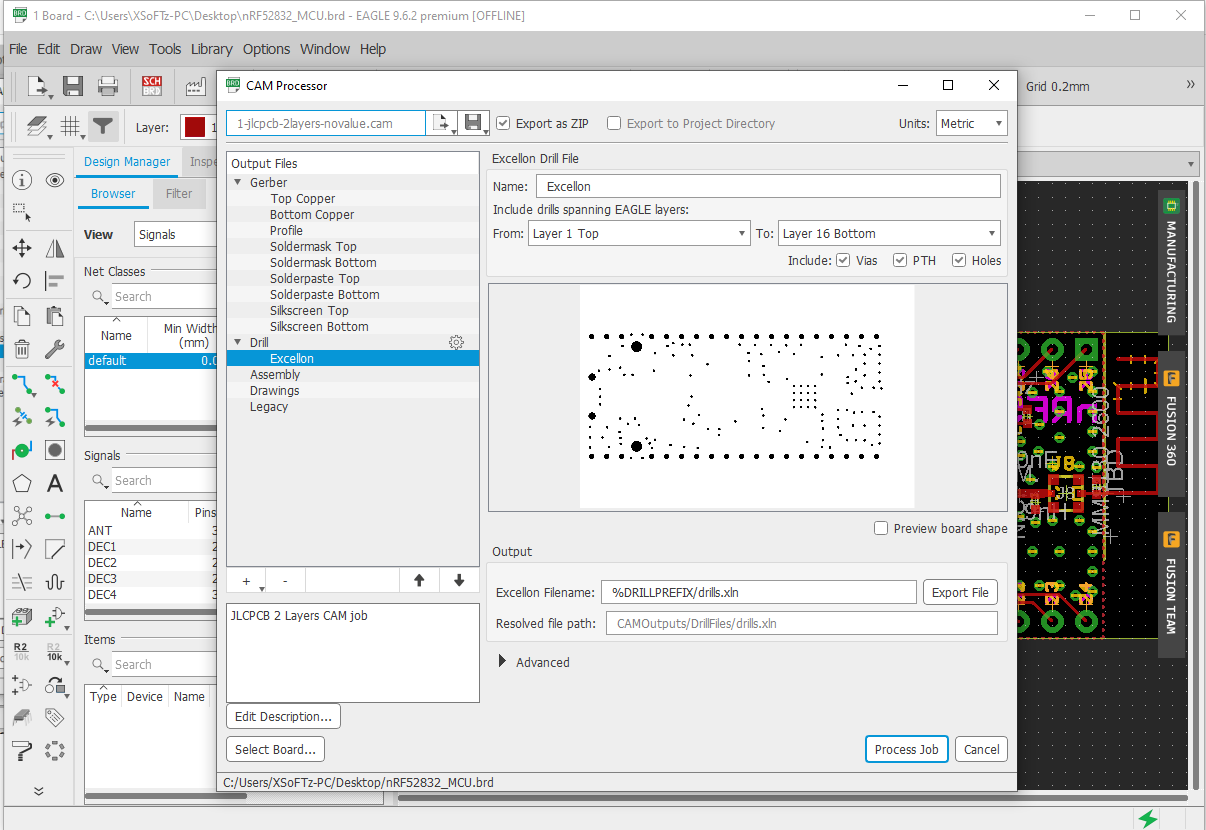
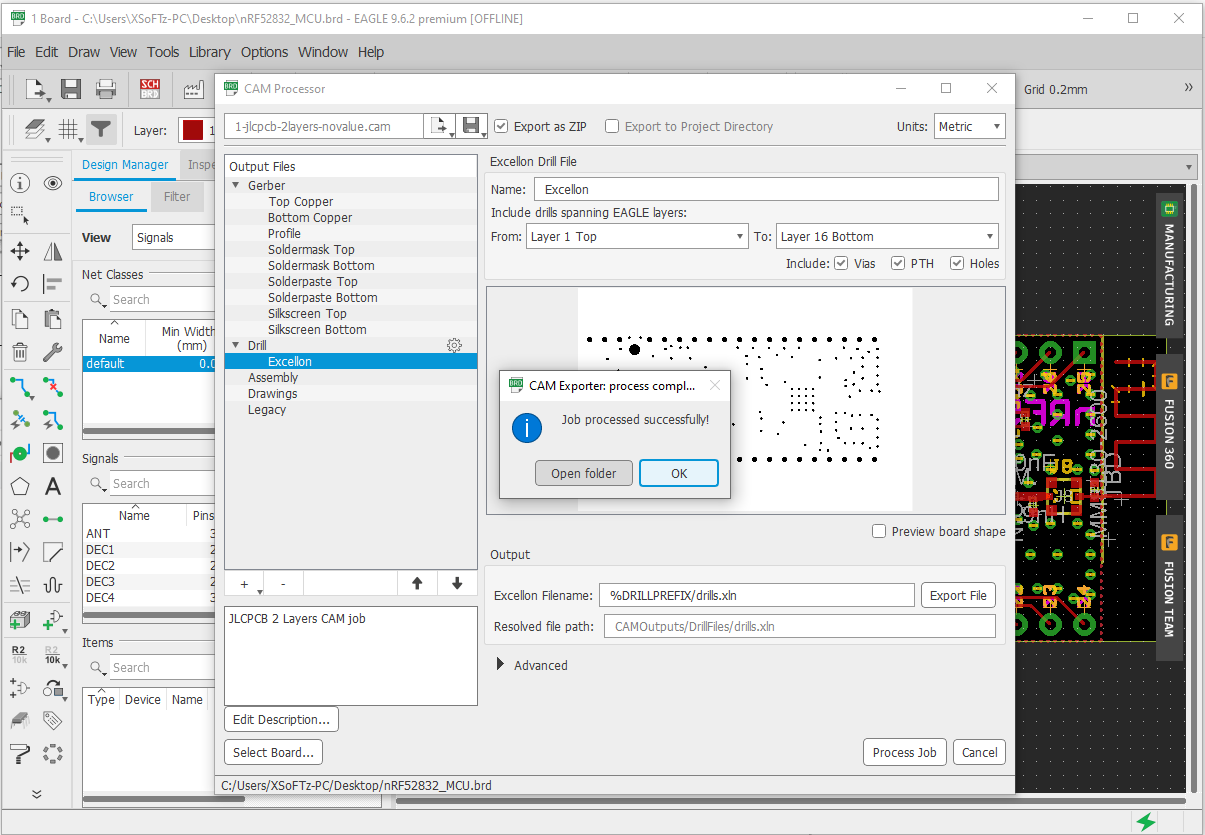
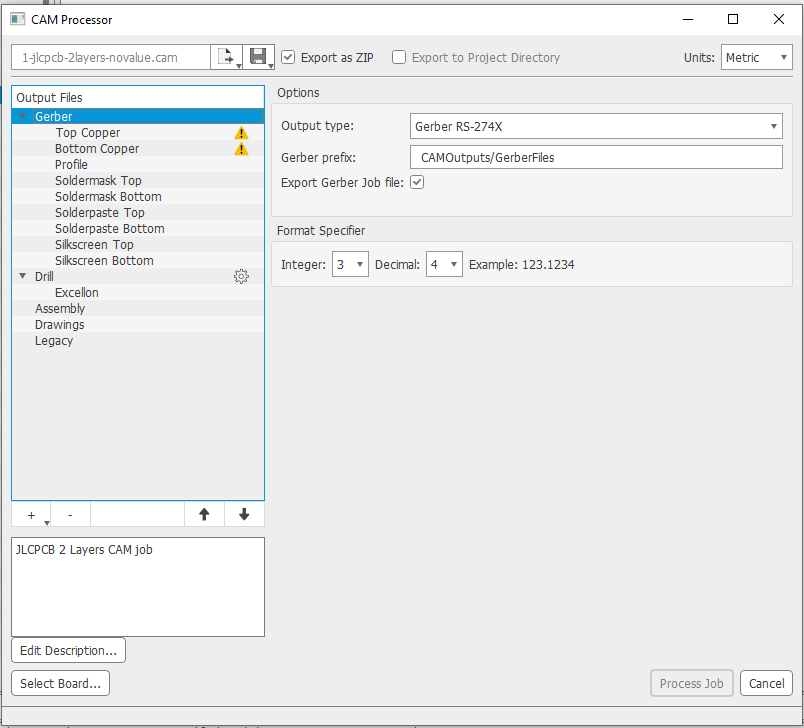
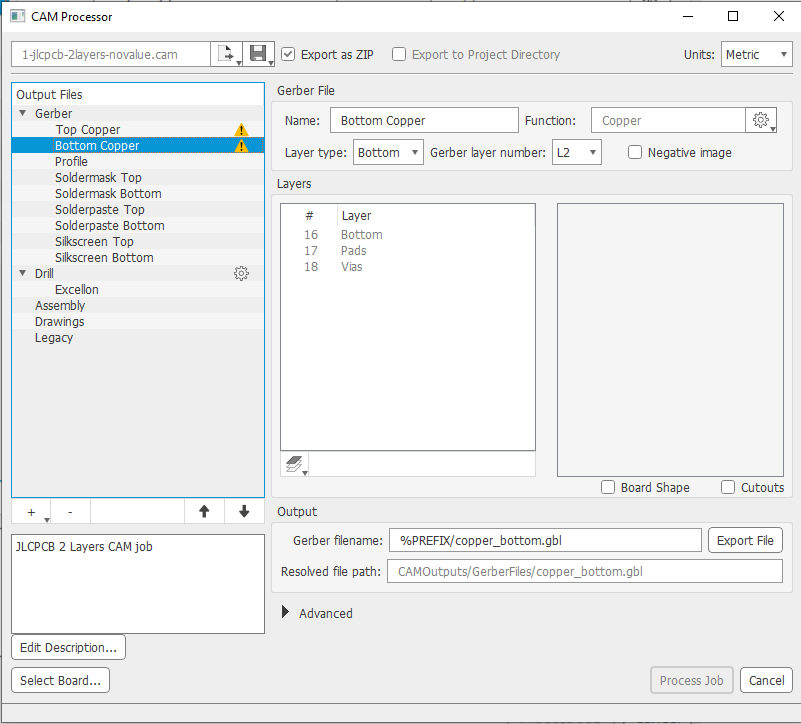
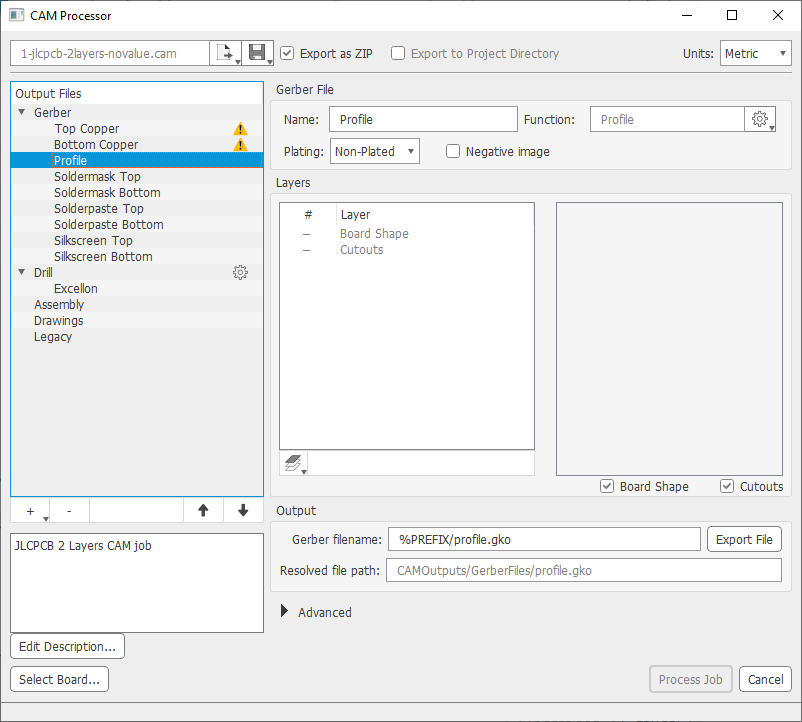
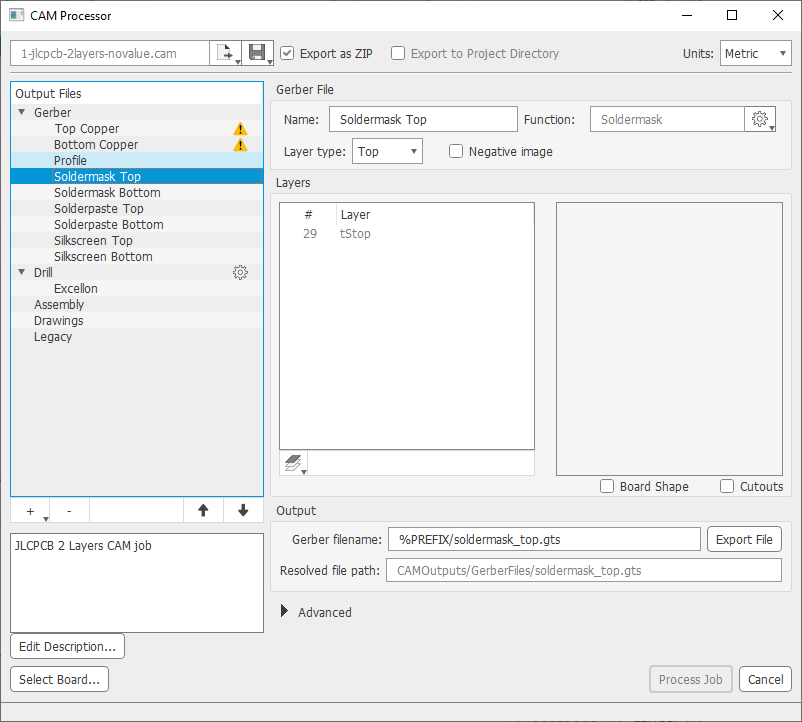
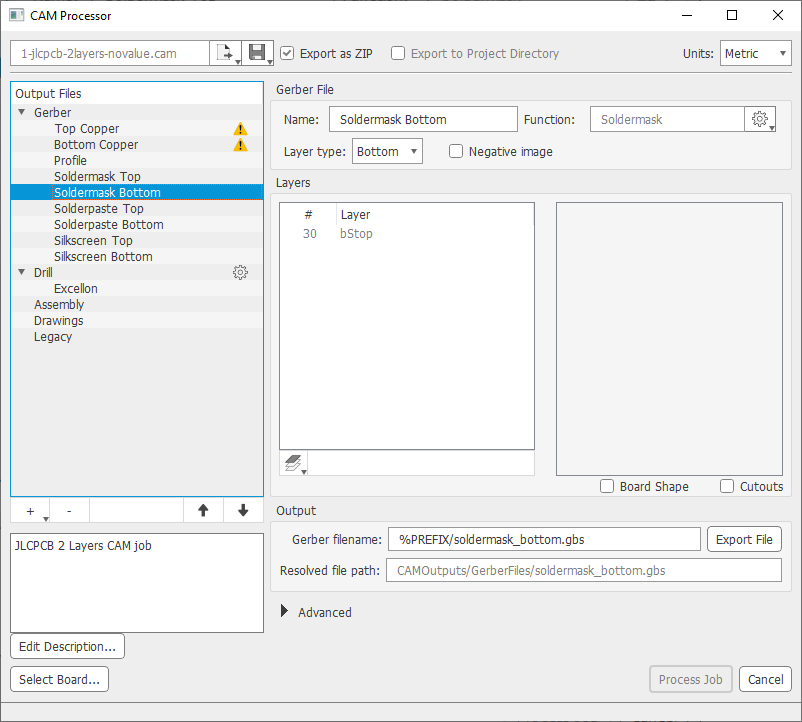
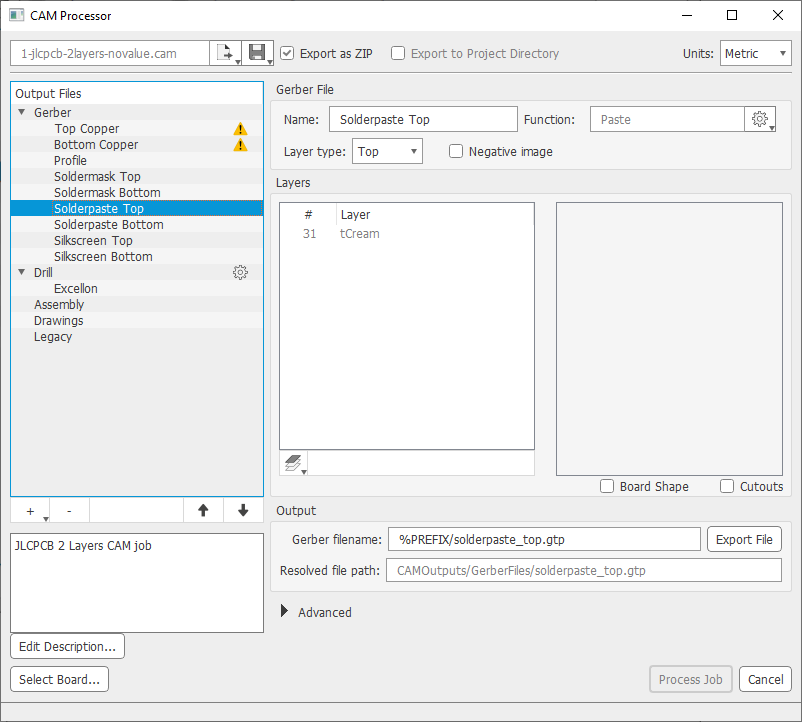
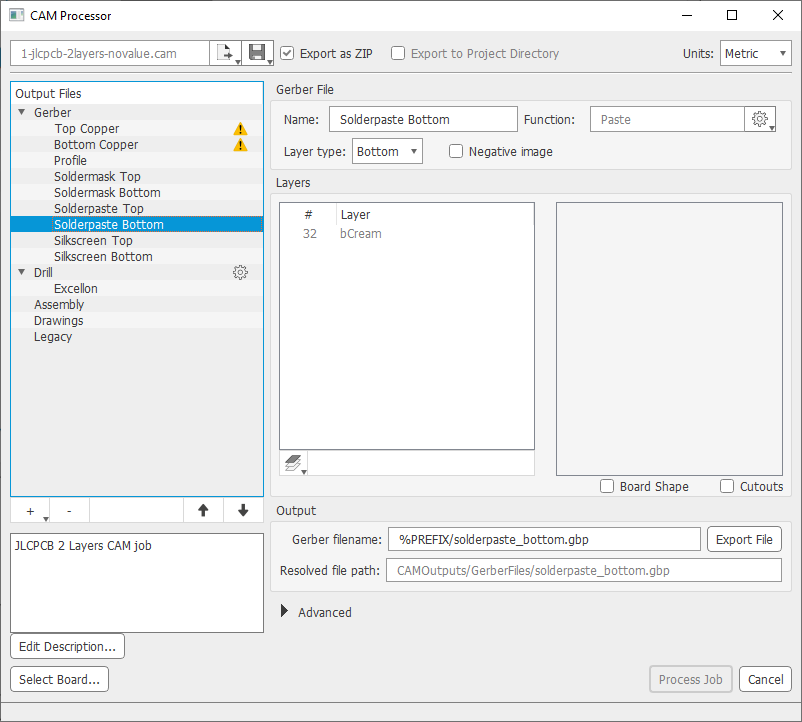
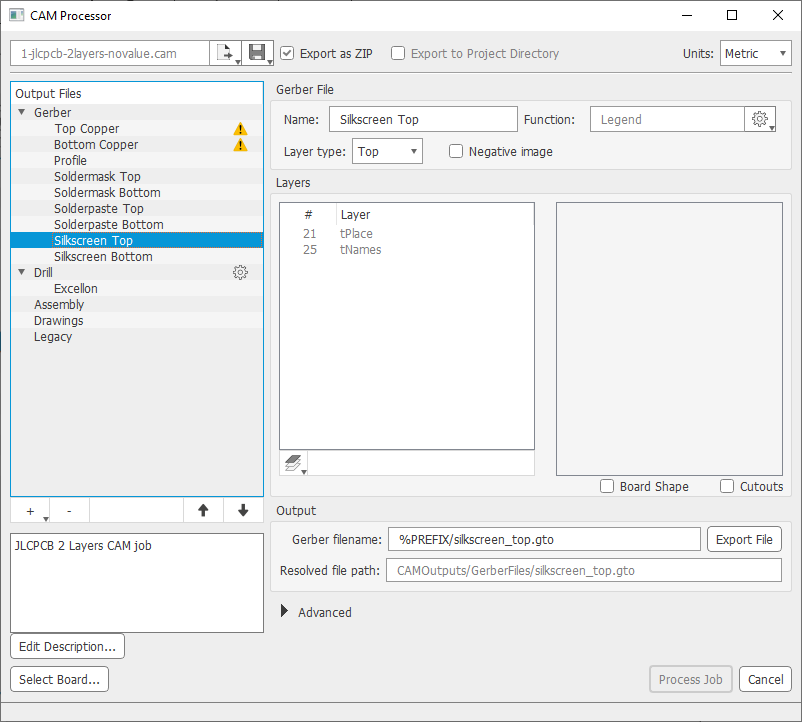
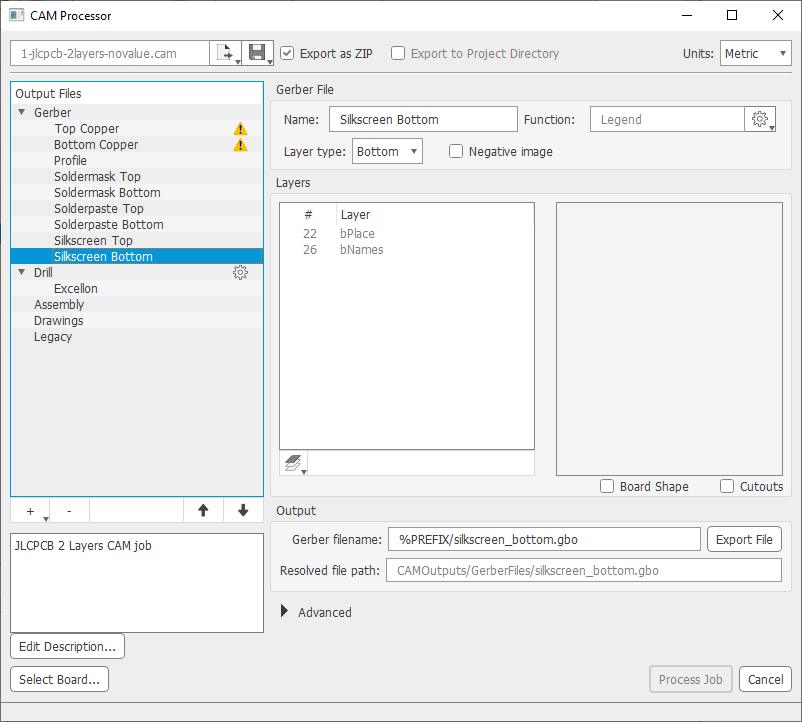
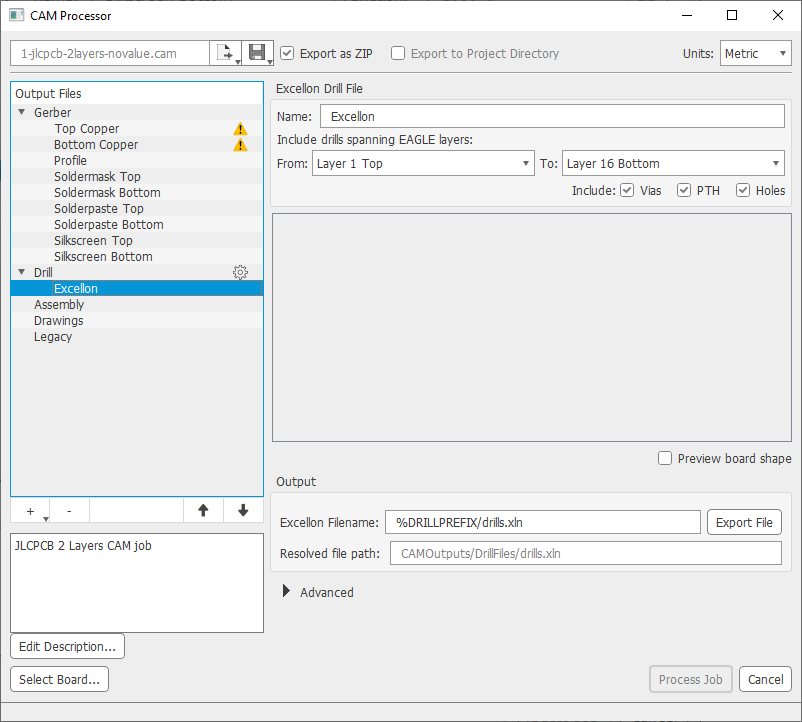
วิธีการเรียกใช้งาน หรือ ส่งออก GERBER